
Step-by-Step Solar Panel Installation Guide
- Assess Your Energy Needs
Begin by evaluating your household’s energy consumption. Review your electricity bills to determine your average monthly usage in kilowatt-hours (kWh). This assessment helps in sizing your solar system appropriately.
- Site Evaluation and Planning
Conduct a thorough site assessment to determine the best location for your solar panels. Key considerations include:
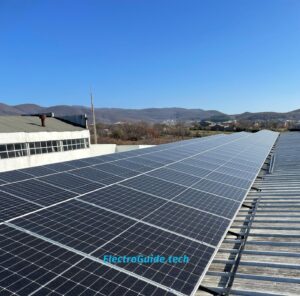
- Roof Orientation and Tilt: In the Northern Hemisphere, south-facing roofs with a tilt angle between 15° to 40° are ideal for maximum sunlight exposure. Better Homes & Gardens
- Shading: Ensure the selected area is free from shading by trees, buildings, or other obstructions during peak sunlight hours.
- Structural Integrity: Verify that your roof can support the weight of the solar panels and mounting equipment.
- Obtain Necessary Permits
Before installation, secure all required permits and approvals from local authorities and utility companies. This step ensures compliance with building codes and facilitates grid connection.
- Select the Right Equipment
Choose high-quality components for your solar system, including:
- Solar Panels: Monocrystalline panels offer higher efficiency, while polycrystalline panels are more cost-effective.
- Inverters: Decide between string inverters, microinverters, or power optimizers based on your system design and shading conditions.
- Mounting Structures: Select appropriate racking systems compatible with your roof type.
- Batteries (Optional): For energy storage, choose batteries that match your energy needs and budget.
- Install Mounting System
Begin the installation by setting up the mounting system:
- Marking: Outline the placement of the mounts on the roof.
- Drilling: Drill holes into the roof rafters and secure the mounts using bolts.
- Sealing: Apply sealant around the mounts to prevent water leakage.
- Attaching Rails: Fix the mounting rails onto the secured mounts, ensuring they are level and properly aligned.
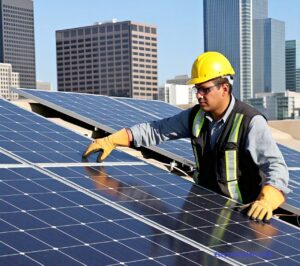
- Install Solar Panels
Once the mounting system is in place:
- Positioning: Place the solar panels onto the mounting rails.
- Securing: Use clamps to secure the panels to the rails, ensuring they are firmly attached.
- Wiring: Connect the panels in series or parallel configurations based on your system design.
- Electrical Wiring
Proper wiring is crucial for system efficiency and safety:
- Connect Panels to Inverter: Use appropriate cables to link the solar panels to the inverter.
- Grounding: Ensure all components are properly grounded to prevent electrical hazards.
- Install Safety Devices: Incorporate circuit breakers and surge protectors as per local electrical codes.
- Connect to the Grid
After completing the wiring:
- Utility Metering: Coordinate with your utility company to install a net meter, allowing you to feed excess electricity back into the grid.
- Inspection: Schedule an inspection with local authorities to verify the system’s compliance with regulations.
- System Testing and Commissioning
- Power On: Activate the system and monitor its performance.
- Monitoring: Use monitoring software or devices to track energy production and system health.
Common Mistakes to Avoid When Installing Solar Panels
Even with the best intentions, many homeowners and businesses fall into traps that can reduce the efficiency or lifespan of their solar panel system. To ensure your investment delivers long-term benefits, here are some critical mistakes to avoid during solar panel installation:
- Underestimating Energy Needs
Failing to calculate your actual energy consumption can result in an undersized system. Accurately assess your daily and seasonal usage patterns to ensure your solar setup can meet your household or business demands.
- Neglecting Roof Assessment
Before installing panels, inspect the roof’s structure, tilt, orientation, and shading. An unsuitable or damaged roof can reduce efficiency or require costly modifications later.
- Not Considering Future Expansion
Plan ahead. If your energy needs grow, it’s better to have a system that can be scaled. Install compatible inverters and leave physical space for additional panels.
- Skipping Permits and Local Regulations
Many users ignore local rules or miss required permits, leading to legal trouble or dismantling. Always check building codes, HOA restrictions, and net metering policies in your area.
- Choosing Low-Quality Equipment
Using cheap solar panels, inverters, or mounts can lead to poor performance, reduced lifespan, or failure. Stick to reliable, warranty-backed brands for long-term returns.
- Ignoring Maintenance Requirements
Solar systems are low maintenance, but not maintenance-free. Dirt buildup, loose connections, or shading can reduce performance. Schedule regular cleaning and inspection.
- Improper Installation
DIY setups or hiring unqualified installers can lead to misaligned panels, wiring issues, or safety hazards. Always choose certified, experienced installers. - Overlooking Warranty & After-Sales Support
Ensure that both the equipment and workmanship are covered under warranty. Check that your installer offers prompt service for troubleshooting or replacements.
- Disregarding Safety Measures
From working at heights to handling live electrical components, safety is paramount. Use proper PPE and follow national electrical codes and best practices.
- Not Taking Advantage of Incentives
Solar tax credits, rebates, and subsidies can greatly reduce your upfront cost. Many users miss these opportunities by not doing proper research beforehand.
External Links (Authoritative & Trustworthy):
Ministry of New and Renewable Energy (MNRE) – Govt. Solar Subsidy Info
Government solar subsidy schemes in India.